meto기반 expo로 실행하기
npx create-expo-app . --template //새로운 Expo 프로젝트를 생성
npx expo install react-dom react-native-web // React Native 코드를 웹 browser용 HTML/CSS로 변환해주는 패키지 설치
npm run web // npx expo start --web 과 동일
LoginView 최초 생성(/src/screens/LoginView.tsx)
📂LoginView.tsx
import { View, Text, StyleSheet } from 'react-native'

export default function LoginView() {
    return (
        <View style={styles.container}>
          <Text style={styles.brand}>yWeather</Text>
          <Text style={styles.subtitle}>로그인 후 상암동 날씨를 확인하세요</Text>
          {/* 이메일 입력 */}
          {/* 비밀번호 입력 */}
          {/* 로그인 버튼 */}
          {/* 회원가입 버튼 */}
        </View>
      )
}

const styles = StyleSheet.create({
    container: {
        flex: 1,
        backgroundColor: '#ffffff',
        paddingHorizontal: 24,
        justifyContent: 'center',
      },
      brand: {
        fontSize: 36,
        fontWeight: '700',
        color: '#111111',
        marginBottom: 8,
      },
      subtitle: {
        fontSize: 14,
        color: '#6b6b6b',
        marginBottom: 32,
      },
})
App.tsx에 LoginView.tsx연결
📂App.tsx
import LoginView from './src/screens/LoginView';

export default function App() {
  return (
    <View style={styles.container}>
      <LoginView />
      <StatusBar style="dark" />
    </View>
  );
}
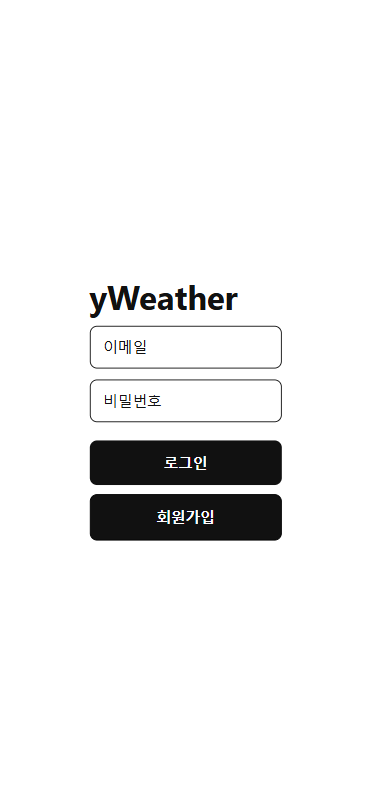
회원가입 폼 만들기
📂LoginView.tsx
import { View, Text, StyleSheet, Pressable, TextInput } from 'react-native'

export default function LoginView() {
    return (
          <TextInput
            style={styles.input}
            placeholder="이메일"
            keyboardType="email-address"
            autoCapitalize="none"
          />
          <TextInput
            style={styles.input}
            placeholder="비밀번호"
            secureTextEntry={true}
          />

          <Pressable style={styles.btnLogin}>
            <Text style={styles.loginTxt}>로그인</Text>
          </Pressable>
          <Pressable style={styles.btnSignup}>
            <Text style={styles.signupTxt}>회원가입</Text>
          </Pressable>
        </View>
              )
}

const styles = StyleSheet.create({

      input: {
        borderWidth: 1,
        borderColor: '#111111',
        borderRadius: 8,
        paddingHorizontal: 14,
        paddingVertical: 12,
        fontSize: 16,
        color: '#111111',
        marginBottom: 12
      },
      btnLogin: {
        backgroundColor: '#111111',
        paddingVertical: 14,
        borderRadius: 8,
        alignItems: 'center',
        marginTop: 8
      },
      loginTxt: {
        color: '#ffffff',
        fontSize: 16,
        fontWeight: '600',
      },
      btnSignup: {
        borderWidth: 1,
        backgroundColor: '#111111',
        paddingVertical: 14,
        borderRadius: 8,
        alignItems: 'center',
        marginTop: 10
      },
      signupTxt: {
        color: '#ffffff',
        fontSize: 16,
        fontWeight: '600',
      },

})
expo는 괜찮은데 개발자도구의 모바일 레이아웃 깨지는 현상 해결
📂LoginView.tsx
export default function LoginView() {
    return (
        <ScrollView contentContainerStyle={styles.container}>
        </ScrollView>)
      )
}

const styles = StyleSheet.create({
    container: {
        flexGrow: 1, // 부모의 남는(여유) 공간을 해당 요소가 “늘어나서(성장)” 채우게 함. 값이 클수록 더 많이 차지.
        backgroundColor: '#ffffff',
        paddingHorizontal: 24,
        justifyContent: 'center',
      },
})
useState로 폼에 값 넣기
📂LoginView.tsx
import { useState } from 'react'
export default function LoginView() {
  const [email, setEmail] = useState('')
  const [password, setPassword] = useState('')

  return (

    <TextInput
        value={email}
        onChangeText={setEmail}
    />
      <TextInput
        value={password}
        onChangeText={setPassword}
    />

  )
}'IT > React' 카테고리의 다른 글
| React+Tyscript (2) DB연결(supabase) (0) | 2026.08.08 |
|---|


댓글